Pages

Friday, June 13, 2014

Happy Birthday!


My best friend, Casey, moved away a few years ago, and I missed her horribly. She would visit once in a while and we'd have the best time traipsing around the city, eating lunch alfresco, exploring places we had never been. It was on one of these visits that I found out her favorite fruit was watermelon.


I never much cared for it and couldn't really enjoy it. It seemed like a really messy way to eat water. Then one day, when I was 8 years old or so, I was able to put off homework by eating slice after slice of watermelon. That made it that much more enjoyable.
But the best way to make me really like something, is to see someone I love enjoy it. There we were, Casey and me, sitting under the summer sun in our city, eating lunch, and she had a big bowl of watermelon and a smile. After that, I made sure we got watermelon every time we hung out the rest of that summer.

 
Then, after she went back out of state, I found this recipe over a year ago and I saved it for her return. Finally, this year, I was able to make some for her birthday.

I made some modifications, of course.
I cut the sugar in the watermelon syrup and didn't strain it.
I increased the amount of watermelon in the curd and left out the dye.
Though yummy, the curd won't taste much like watermelon immediately once it's made. After a night in the fridge, however, the flavor becomes much more apparent.
I chose an entirely different cake recipe: Genoise.

Watermelon Syrup
Equal parts Watermelon juice and Sugar.

Liquidize watermelon flesh in blender. I made 3 cups. Pour into a container with an equal amount of sugar- so I added 3 cups of sugar. Give it a good stir and let sit covered in the fridge as least 6 hours.


Watermelon Curd
5 Tbs Butter
1 cup + 2 Tbs Sugar
2 Whole Eggs
1 Egg Yolk
5 Tbs Watermelon Syrup

Cream the butter and sugar then add the eggs, one at a time, fully incorporating after each addition. Add the yolk and cream until smooth. Cook over low heat, whisking constantly. Once thick like pudding, remove from heat and continue whisking for a few minutes. When the curd has reached room temperature, add watermelon syrup one tablespoon at a time, fully incorporating with a whisk after each addition. Spoon or pour into jars and refrigerate.


Genoise Cake (From Williams-Sonoma Mastering: Cakes, Frostings & Fillings)
4 Tbl Unsalted Butter
1 1/2 cups Cake Flour OR 3/4 + 3/8 AP Flour and 3 Tbl Cornstarch
8 Large Eggs
1 1/3 cup Granulated Sugar
1 tsp Vanilla

Equipment
A small sauce pan
A Sifter
A double boiler
A whisk
A large bowl
A small bowl
A hand held mixer or a stand mixer
A rubber spatula
2 9 inch round cake pans
Parchment
Butter and flour for dusting the pans and parchment
A testing stick
A sharp serrated knife

Now don't let that scare you.

Preheat the oven to 350F and prepare the pans by lining them with parchment, greasing them, and then sprinkling with flour.

Sift the flour (and the cornstarch, if using). This is very important.
Melt the butter in your small sauce pan. Set up the double boiler- the water should not touch the bottom of the bowl- and bring it to a simmer.

Whisk the eggs and the sugar in the double boiler until well blended. Keep whisking over the simmering water for about 3 minutes until sugar is dissolved and the eggs are warm. Use an instant read thermometer if you want to be detail oriented. It should read 120F.

Pour the warmed egg mixture into a stand mixer, or remove the bowl and start running your hand mixer. Beat the eggs on medium high until they reach the ribbon stage. They'll be thick, pale yellow, and it will fall back on itself like a ribbon when you lift the beaters.

Hold the sifter over the eggs and sift a third of the flour in. Gently fold the flour in, making sure not to deflate the eggs. Repeat with the rest of the flour.

Drizzle in the butter (re-melt, if need be) and the vanilla. Gently fold them in.

Pour the batter evenly into the two prepared pans and bake for approximately 18 minutes until golden and firm to the touch.

Remove from oven and let cool for at least 10 minutes before removing from the pans.

Watermelon Cake, Assemble!

Trim any ragged edges from the 2 cakes using the serrated knife. Cut each cake horizontally into two layers. Brush the cut side of each layer with watermelon syrup, let it soak in, then brush again. Repeat as many times as you like, just let them dry a bit before each application.

Optional: Take one of the layers and cut out three to four circles from it to make a mini cake.


Place one layer on a cake stand or serving plate. Plop on a generous dollop of watermelon curd and pipe watermelon cream in a thick circle around the edge. Place a second layer on top and repeat with the curd and the cream and the cake until you've used all the layers. Slide wooden skewers into the cake for a bit of stability and to keep the whole thing from sliding. Do the same with the mini cake layers, if you choose.

Plop a whole lot of cream on top of the cake and spread it gently over the surface with an offset spatula, evenly coating the cake. Coax the cream down the sides and add as much a you want as the need arises. Do the same with the mini cake.


Mini Cake Bonus: Cut a heart out of the scraps you used to cut the mini cake and set it on top of the assembled cake, pink side up.


Pop the whole thing in the fridge to let the cream firm up before serving.

Slice.


Yum.


Thursday, June 5, 2014

Blogger Spotlight ~ Anna MacArthur

I like watching people grow.
Before you assume I'm a really slow creeper, let me explain.
There's a young woman I've known since she was a younger girl, and that whole time she's been developing her talent for art.
I've mentioned Under the Bear Hood before. The blogger over there is Anna MacArthur, artist and author. I've known her since I was 15. So that would be... (20ish subtract the 15...hmm) 9 years.

She displays her art online through devinantArt as Eightcrows and as TheBookof-thePeddler, and on her own blog.

The drawings and paintings that she's released usually feature characters from the books she is writing or important characters from another's story.
Her pictures range from cheerful to creepy


TT Reports 3 picture by eightcrows


Viva el Papa by eightcrows 


What an empty house you have... by eightcrows


The Hanging Tree by eightcrows


Hollow childhood by TheBookof-ThePeddler


And there's this: my favorite of her stylings


I love the use of pen, lines, and proportion. I can't help but think this would a good way to illustrate an old world fairy tale where too many things go wrong.

In addition to all that, she regularly draws little comic strips about her own life. They are simple and boldly honest. I love that about them.


So, please, go visit Anna MacArthur and have a gander. It'll be fun.

Tuesday, May 27, 2014

The Strangest Pop

Call it soda, call it pop, or call it coke. Whatever you call it, you probably haven't had it flavored with kale. I never thought I would either, however... You know how things work around here. If it seems odd, we have to put it in our mouths. So far, even counting kale soda, we have not been punished for that philosophy.


Kale soda does not taste like a vegetable. It doesn't taste grassy or cabbagey. It tastes refreshing, light, and a little green. It's surprisingly good.


And it makes a great John Collins.


Seriously, I'm pretty sure I have a favorite cocktail now. I hadn't before, but now I have one.
I've replaced the usual with a whole lot of the kale stuff. The kale soda and whiskey blend really well, and the whiskey is mellowed considerably.


Kale John Collins
Makes 1, or 2 "just a little" ones.

8 oz. Hansen's Natural Cane Soda, Kale flavor
1.5 oz Evan William's Sour Mash Bourbon Whiskey
1 oz Lemon Juice
0.5 oz Simple Syrup

Shake whiskey, lemon juice, and syrup in a shaker with a cup of ice.
Pour over ice in a tall glass.
Top off with kale soda.


Cheers!


It's been a long time since I've last posted. Hopefully, that will be the last absence from me for a good long while. For now, accept this photo of a cow creamer eating kale.


Tuesday, May 6, 2014

Not much

I have no recipes this week.
Just pretty pictures of mushrooms.


Tuesday, April 29, 2014

Hemp Hearts and Peanut Butter Cookies

I was going to type up some little journal entry, but I'm too tired. This past weekend was a drawn-out series of social and physical exertion and I'm fork-poking done. This coming weekend will be just as bad.


Fortunately, these cookies are easy and satisfying. They are made with hemp hearts and peanut butter with a few other things thrown in for good measure. I ate them for a snack yesterday and again for breakfast today.


If you are one of those people that needs motivation to scarf cookies, then you should know that three tablespoons of hemp hearts packs 10 grams of protein and a veritable potpourri of vitamins and minerals. Add the peanut butter's stats to those numbers, and you're good.


Crunchy Hemp PB Cookies
Adapted from Adam Hart's Recipe
2 dozen cookies, depending on size.

1 cup Hemp Hearts
1 cup Crunchy Peanut Butter
2 Large Eggs
1/3 cup Brown Sugar
1/2 tsp Baking Soda
1/2 tsp Cinnamon
1/2 cup Rolled Oats

Mix all ingredients in a bowl. Roll dough into balls and place on a greased cookie sheet. Flatten with the greased bottom of a glass. Bake at 350 F for 10 minutes.

Yum.

Wednesday, April 23, 2014

Slices of Sunshine for Easter

Christos Aneste!
Christ is Risen!

Alithos Anesti!
 He is Risen Indeed!

 Happy Easter, Everyone! I hope you all are enjoying this Easter season.

I must apologize for my absence last week. I came here several times to post, found I wasn't sure what I could say, and then was distracted by posts from my fellow bloggers. I'm always smiling when I read my friends' blogs- particularly A Little White Bird and Under the Bear Hood. A Little White Bird shares pretty snapshots of the emerging spring with a simple, honest joy. Under the Bear Hood serves up charming art with an occasional dash of brutal humor.
I really ought to do a more in-depth features for both these blogs, as well as a few others. Please look forward to them in the coming weeks!

So, in short, I was kept away by my own vague brain and the excuse to procrastinate that only a good read and pretty pictures can offer
But today I make my return!
Bring out the trumpets!
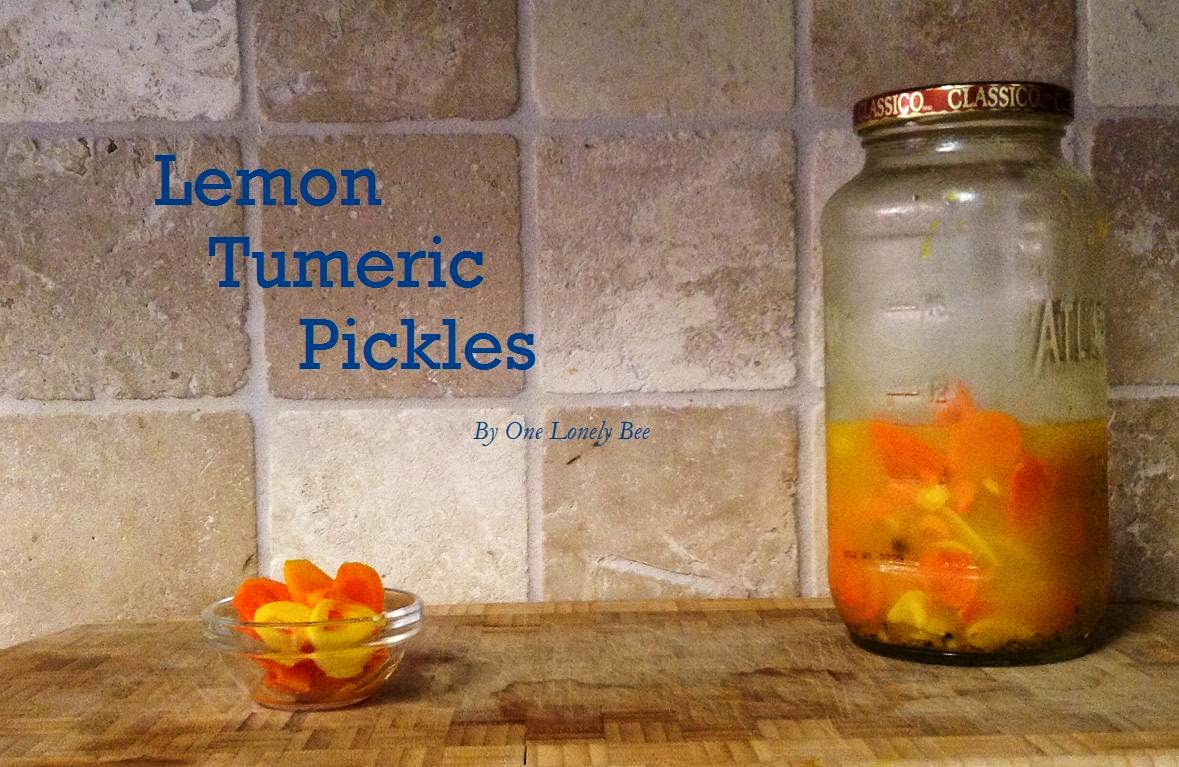
For my welcome back gift, I offer photos and a recipe for Lemon Turmeric Pickles.


I've mentioned before how much we like adventures in the kitchen. In that adventurous spirit, the Boss-lady bought some raw turmeric tubers on a shopping trip. She had no idea what to do with them, but she thought they looked funky. So into her basket they went.


The challenge of what to do with them fell to me. My gigantic Larousse Gastronomique had few clues to help me in my quest- just a couple flavor pairing suggestions and a brief overview of the spice's history.

The internet revealed a few more clues. I learned they should be stored like garlic; in a cool, dark, dry place. The refrigerator is too moist, but a basket on the counter out of direct light should be fine in most kitchens. The tubers can be converted to the more familiar dry powder after roasting, drying, and an amount of grinding too insane to be cost effective in our little home kitchen.

I could use the tubers to grow my own turmeric plants which I could harvest for a bigger yield later. For that, the tubers must be stored in a dry, dark spot until buds begin to sprout. One would then cut the tubers into shorter pieces and plant.

I also picked up some info about the spice's health benefits. Eating a half teaspoon a day can reduce inflammation, among other things.

For all this, culinary use of the whole, raw tuber seemed to be restricted to juicing in smoothies, crushing into cold-combating elixirs, and pickles. Potables didn't appeal to me that day so I chose to explore the third option.


A couple of the turmeric pickle recipes I found used lemon juice as its only acid. I took a page from the Gastronomique and used ginger as an accompanying spice. I had noticed that the internet said to eat pepper with turmeric, and my health-conscious mom echoed that. Garlic and salt played their parts in this recipe as well. The salt was pink because I find it hard to pass up an opportunity to use it wherever I can.


These are pungent. Biting into one is like putting a crisp slice of sunshine between your teeth. The flavor is an explosion of bright lemon. While the taste is a little too strong to eat alone, I really enjoy a couple slices on a cracker with pesto or nestled into a hearty sandwich. I imagine these would also be great chopped into a relish or a tangy potato salad.


Lemon Pickled Turmeric
1 cup Turmeric Tubers
3 Large Cloves Garlic
1 cup Lemon Juice
1/4 Salt
1 tsp Coarsely Ground Pepper
1/2 tsp ground Ginger

Peel the turmeric and slice them thinly lengthways or on a diagonal. Try to make the slices between 2 and 3 millimeters thick. Skin and slice the garlic to the same width. Toss garlic and turmeric slices into a jar.

Mix lemon juice, salt, pepper, and ginger then pour over turmeric and garlic.

Close up the jar and give a good shake. Let sit in the fridge for 2-3 days.


Tuesday, April 8, 2014

Onigiri

This coming weekend in Houston is the annual Japanese Festival in Herman Park! Since I joined my dojo three years ago, I've awaited the festival every year with anticipation and bated breath. I've performed in our festival demos since joining, and I think I'm finally getting the hang of the emotional roller coaster of performing in public.

Step one: Panic.
What if I mess it up? I invited friends and family to come and watch. I don't want to look bad in front of them. They're looking forward to seeing something great. What if I disappoint them? Anyway, I won't be the only one I might embarrass. If I mess up, I make my whole dojo look bad. What if my partner doesn't show up? What if he forgets which technique I'm supposed to do? What if I get stage fright? What if I already have stage fright? Oh no! Is this stage fright? Oh gosh! I have stage fright! Great. Now I'm shivering and perspiring cold sweat. Lovely. Now I'm going to look all bedraggled in front of the entire city of Houston- if I ever do make it on stage. Is my hair okay?

Step two: Over compensate.
Okay. Calm down, self. I'm only going to be up there for less than 15 seconds anyway. Just get pumped up and you'll do fine. Talk to other people. That'll distract you. *Sees random team mate* HI LOVELY FELLOW DOJO FRIEND!! LET'S BE AWESOME!!

Step three: Perform.
*Enter stage, bow, and breathe deep* KYAAAAAAAAAAAAAAAAAAAAAAAAAAAAH!

Step four: Realize it's over.
Is it over? Did I even do my technique? I did? I even did it well and looked great? Seriously? But I missed it. Let's go again!

Step five: Enjoy the Festival.
*Runs about still in uniform* Ooh! Lookit kimonos! Lookit tea ceremony! Lookit Taiko drummers! Lookit origami! Lookit deep fried Japanese food! Lookit! LOOKIT!

And on Sunday, I get to do it all again!

To celebrate the coming fest, I'm sharing my own method for making onigiri.
Onigiri are made of rice and a filling- This can be anything you like. Meat, fish, or veggies.I've made sweet-spicy pork filling. I've broiled canned tuna and mixed it with sauce to make a filling. You can braise mushrooms in soy sauce and use them.
My method for making them was gleaned from reading several Japanese cookbooks and glancing about online. There are other methods for various skill levels, but mine is a good way for a beginner to start.


First, get everything together

I'm right handed and like to work left to right. If you're left handed or prefer to work right to left, reverse your set up.
You will need:
* Pot of hot rice
* Wooden spoon (I know my picture shows a metal spoon. Do as I say, not as I do. I do stupid things sometimes and scratch the bottoms of pots.)
* Filling of choice
* Bowl of cold salt water
* Teacup, or whatever you plan on using for a mold
* Plate

Set everything up as in the above picture before you start. Once you start, you're hands will be covered in hot, sticky rice and you won't want to scramble for a plate.

Step 2


Rub the tea cup and your hands with the salty water. Dump any puddles back into the bowl.

Step 3


Fill the cup about half way with hot rice.

Step 4
Dig a pit in the center of the rice, pressing the rice against the walls of the cup.

Step 5
Fill the pit with your filling of choice- about a tablespoon.

Step 6

 Cover the filling with 2 to 3 tablespoons of hot rice.

And tap it down firmly and evenly.


Step 7
Invert your cup over a plate.
Give your cup a tap, then lift the cup away.
 If your onigiri doesn't slide free from the cup, give it another solid tap.
Stubborn onigiri means the cup was too dry or the rice got too cold.


Tada!

Repeat with the rest of your rice and filling.

If you want to take these with you on a picnic (say, to your local Japanese festival to watch the Jujitsu performance) let the onigiri cool and wrap them individually in plastic wrap before packing in a cooler.